This section explains the installation procedure for the OpenLDAP service (slapd) and LDAP management utilities. This installation will create a functional working configuration, setting up an instance of a data storage database. At the time of installation, the host's domain name must be determined.
Before starting the installation process for this service, we need to perform some preliminary equipment configuration. We will need to configure:
Once the IP address and hostname are configured, we will proceed to the SLAPD installation.
We are going to install the slapd and ldap-utils administration utilities packages. The command would be: sudo apt install slapd ldap-utils.
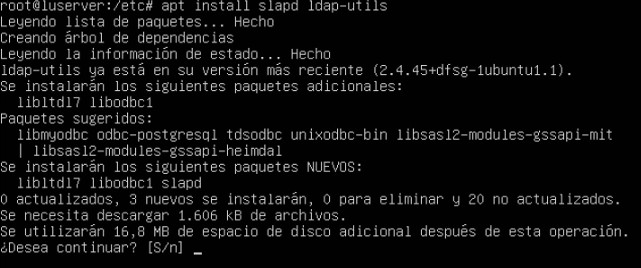
During the process, you will be prompted to confirm the installation:
Type s and press Enter. We then move on to slapd configuration.
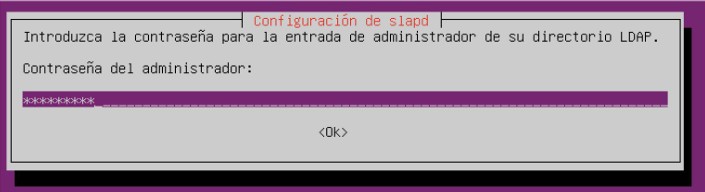
First, it asks for the administrator password for your LDAP directory. So, we specify a strong password.
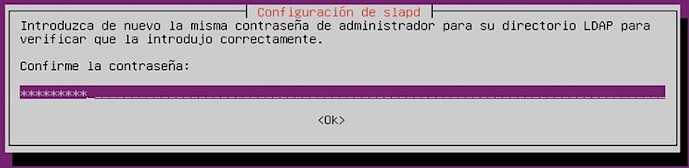
We re-enter it and confirm. Once this is done, the entire service has been installed. We can check it with the command:
If everything is correct, it should show as active (running).

Now we need to configure this service and adjust it to our needs. We will configure the domain data using the command: dpkg-reconfigure slapd.
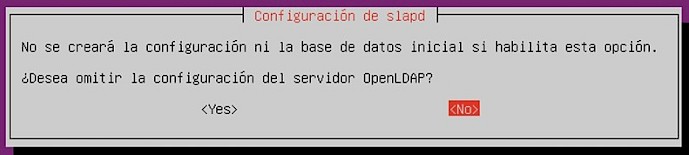
We begin with the configuration: In the first window, it asks if we want to skip the OpenLDAP server configuration; we must leave the default option, which is NO.
Next, it asks for the DNS domain name, and by default, it shows the one configured in the hosts file. So we leave it as is and click OK. For the domain name, we will use the one we assigned in the first quarter (e.g., mates.triana). In the next window, it asks for the organization name, so we can leave the default name.
Then it asks again for the LDAP directory administrator password. We can re-enter the same password as when we installed it, or we can choose a new one. We confirm.
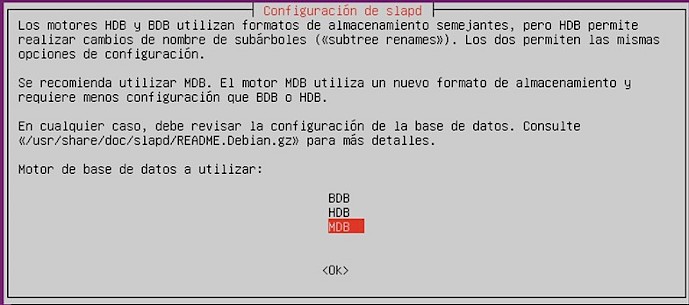
In the next window, it asks for the database engine we want to implement. MDB is recommended, as it is the most modern and simplest. HDB and BDB engines use similar storage formats, but HDB allows subtree renames. Both allow the same configuration options. The MDB engine uses a new storage format and requires less configuration than BDB or HDB. In any case, you should review the database configuration. See /usr/share/doc/slapd/README.Debian.gz for more details.
Next, it asks if we want the database to be deleted when slapd is purged; we leave the default option, NO.
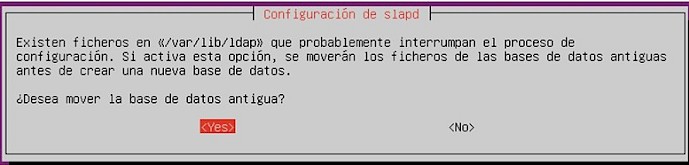
Finally, it asks if we want to move the old database, and we say yes. If this option is enabled, old database files will be moved before creating a new database, in case files exist in /var/lib/ldap that might interrupt the configuration process.
With this confirmation, the configuration process has finished. We can check the configuration of our created directory with the command: slapcat.
We can observe the domain created, e.g., dn: dc=triana, dc=ies. Additionally, we can observe the entire directory structure created with the installation of this service. We need to navigate to /etc/ldap, where all the schema and the database of our installed service are located.
To access the OpenLDAP configuration part, we need to set the password for the administrator of this protocol's configuration area. The administration password we set during installation is valid for the configuration of our file directory that we are creating, but not for the general LDAP configuration.
To set this password, we will need to create an ".ldif" file that modifies the olcDatatabase={0}config.ldif configuration file, which is located in /etc/ldap/slapd.d/cn=config/.
First, we need to generate a valid key for this user. This key must be encrypted, and to generate it, we need to use the command available in slapd, called slappasswd. When we enter this command, it prompts us for the password and its confirmation to finally generate that same password encrypted with SSHA.
An example would be
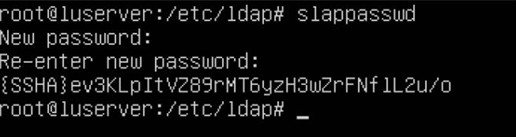
We can see how it has generated the encrypted password with the SSHA encryption algorithm. This string is what we will have to introduce into the configuration file of the "cn=config" branch.
Once the key is obtained, we need to generate an ".ldif" file with the necessary information to access the machine with these credentials. The file (you can name it add_admin.ldif) must have the following content:
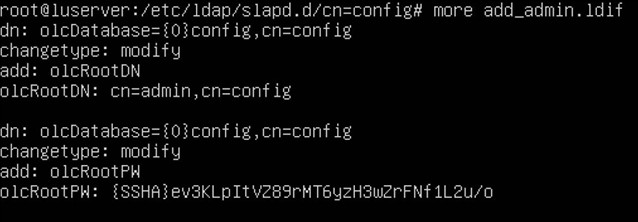
Once our ldif file is prepared, you can call it add_admin.ldif, we have to execute the slapd modification order.
ldapmodify -Q -Y EXTERNAL -H ldapi:/// -f add_admin.ldif
The result of the configuration file would have two new entries (content of 'olcDatabase={0}config.ldif', located in /etc/ldap/slapd.d/cn=config/)
